For the story behind some of these photographs, visit Books.
Some of the best advice I ever received came from an established photographer when I was just beginning to study photography. I asked her what kind of camera to buy (this was before the digital age) and she recommended an inexpensive camera that could only be operated manually. Manual use of a camera is when you set all of the options: shutter speed and aperture included. She explained how important it was to learn how to manipulate a photo with different uses of those options. Even today, though you can take amazing photos with digital cameras, and even though that’s what I use now, it’s good to understand these two aspects of photography, if for no other reason than to know what you did when you created a great image. Then you can do it again!
Shutter speed and aperture are interrelated and, though it’s sometimes hard to grasp their relation and function, once you do and begin to practice using them they will become second nature. It will still probably be no easier to explain but much easier to do.
This excerpt from Kodak’s book, “The Joy of Photography”, explains both of these.
“Exposing film to light has been compared to filling a bucket with water from a faucet. You can open the tap wide and fill the bucket quickly, or open it only a little and let the water trickle in for a long time. The two exposure controls on the camera – aperture and shutter speed – work in the same way. Like the valve in the faucet, the aperture controls the size of the opening in the lens that admits light. The shutter speed determines how long the shutter will stay open to let light pass through.”
 This is the confusing part of aperture: Large number, small opening – Small number, large opening. If your shutter speed remains constant at 60, large apertures, 3.5 for example, allow more light than small apertures with a larger number, 16 for example.
A large aperture (2.5) and a shutter speed of 60 will blur the background. You see only blackberries in this photo and your eye is not distracted by clutter behind the berries.
 This photo of a Mennonite house on washday shows all the elements in the photo from the garden to the stone front of the house. It was taken with a shutter speed of 30 and an aperture of 16, allowing lots of light to enter the camera and show every detail.
Portraits
 One of the greatest compliments anyone could give me, when I was doing portraits, was when they told me, “It looks just like them! How did you get them to look so natural?” Just liking people and enjoying getting to know them is a plus in portrait photography. I always enjoyed talking to people, seniors for example, about their likes, what their extracurricular activities were, what they were doing when they graduated, etc. As I talked, I snapped – not really saying smile or look at the camera. Since I was standing right behind it, they were usually looking at me. A cable release (an extension that allows you to snap a picture while standing a few feet away) is handy because you can move away from the camera a little and interact with your subject while still taking pictures. Practice, practice, practice until you know your camera inside out so it is automatic to talk as you work. It’s the best way to catch people being themselves.
Children are, sometimes, a great challenge. Tiny babies can be set in a car seat which has been covered with a pretty blanket or lace. I always had a rattle for babies and, for an older child, a stuffed animal is useful. Let them sit in a rocking chair or on a rocking horse to keep them in one place. When a very small child is restless indoors, blowing bubbles at them can result in lovely photos when they reach for a bubble as many float past. Outside, give them a dandelion, gone to seed, and let them blow – this makes for great shots!
Always focus on your subjects eyes and, if you are outside and can’t see highlights in their eyes, use a reflector held by an assistant, so that it reflects light back at the subject’s face. You don’t have to buy reflectors. A large sheet of white poster board will work just fine.
So remember – have fun! And all portraits don’t have to be with eyes straight at the camera. Experiment with different angles. A slight tilt of the head will sometimes be more becoming and a three-quarters view of the face is almost always prettier than straight on.
Patterns, Viewpoint and Line
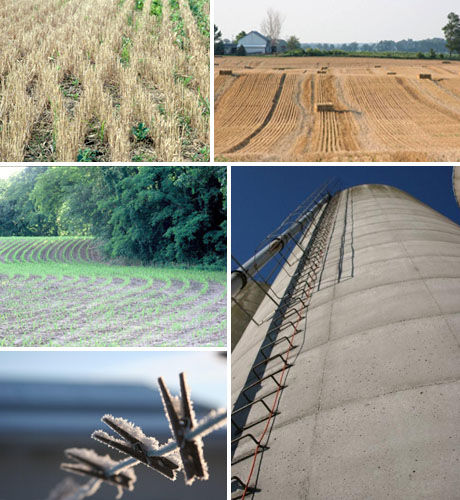
Finding patterns is fun. When you begin to search, you will find that they are everywhere. These pictures of wheat stubble, rows of emerging crops and clothespins on a line are all examples of pattern. An especially useful use of patterns would be showing many items of one color while drawing attention to your focal point by using a different color. When dealing with color, if you aren’t familiar with color wheels, it’s effective to use colors that oppose each other on a wheel. Just type “color wheel” in on your computer and one will pop up.
This photo of a silo emphasizes its size because I got on the ground, very close to its base, and shot up. While it’s not always true, girls usually look more attractive when shot from a viewpoint that is just a little high and males look more manly and forceful when shot from a lower angle.
Line can be used in many ways and one of the most important is in directing the eye to a focal point. It can also be used to show depth and size. These bales, while not in a straight line, call attention to the size of the field.
The Three Main Types of Lighting Are Back, Side or Front
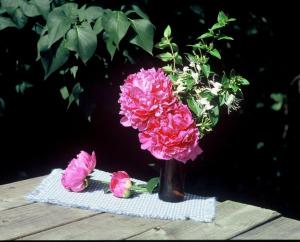
Your subject, the time of day and the feeling you wish to create are factors that help you choose the kind of light you want to use. We’ve already discussed back lighting so, this time, we’ll talk about front and side lighting.
Front lighting is the most direct kind of light and the one many of us are familiar with. The sun is behind the shooter and offers even and broad illumination. A drawback to this type of light is that it doesn’t show shadow or depth in your subject. Front lighting is most helpful when shooting large, flat subjects or areas.
Side lighting is the light most effective for lighting the majority of subjects. Whether it’s a soft, diffused light that emphasizes gentle contours of the human face or a harsh light scraping across a still life, it is usually the most pleasing light. In the accompanying photo notice how side lighting emphasizes each petal in the peony. You will probably find side lighting the most useful and versatile.
Sunlight
 How many times have you stood in the noon sun, while staring straight at it, to have your picture taken? How did you look? There were probably deep shadows where your eyes should show and harsh light emphasized every blemish and wrinkle on your skin.
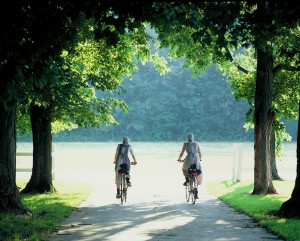
Most people believe you need lots of sun – thinking mid-day – for good pictures. That isn’t usually true. Portraits are nicest when taken either early in the day, or late, because the soft directional light is flattering to complexions. Remember rim lighting that we talked about last time? It’s only effective when the sun is low in the sky. If you can’t do a picture at one of these times, do them in the shade. There is, almost always, enough light in the shade. Since low light calls for a shallow depth of field, shade lighting will make your background soft and diffused, which is perfect for a portrait. In this picture, shallow depth of field blurs the background and places all emphasis on the subject’s face.
When doing landscapes, taking your picture just as the sun rises and before it sets will add a golden glow to photos. When there is snow on the ground, get up just before dawn and get ready to shoot your favorite landscape as the sun rises over the horizon. The snow will be blue! Did you realize the way colors change throughout the day? Before I studied photography I didn’t and it was a wonder to me to see those changes on film that our eyes don’t see.
Next time we’ll see how the direction light comes from changes photos.
Photography is light
Once, in the not too distant past, it was the way light was recorded on film. In today’s world of digital cameras, we learn about CF cards, mega pixels, JPEG or RAW, but no matter the miracles of digital photography, if you don’t understand the various nuances of light, much will be lost in your photos. Light can change from season to season, or even hour by hour, and a basic knowledge of it can take your pictures from “nice” to “great.” Books have been written about light and whole college semesters teach it, but I will try and give you a quick tutorial that I hope will help you create calendar- worthy art.
This picture from page 20 of my book is an example of back lighting. The girls in this picture are backlit and the sun shining behind them causes a pleasing rim of light around their hair and bodies. To create rim lighting you will need a light meter to light the subject to keep the photo from turning into a silhouette. If you don’t meter your subject, the automatic light meter on your camera will be fooled by the abundance of light in the background and your picture will be overexposed. There is no need to purchase an expensive meter that can do everything but drive your car. You only need something simple. Just get very close to your subject and meter off your hand or the face of your subject. Point the meter toward from where you will take the picture. This technique will almost always give you a proper reading. Then set your camera to “manual” at the aperture and shutter speed suggested by the light meter. This can be done with a digital or film camera. Experiment with different aperture settings. If available light allows, note the difference between an aperture of four as opposed to a setting of twenty-two.
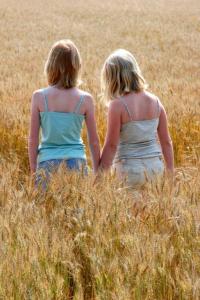
Back lighting creates a golden rim around these girls giving an ethereal feeling.
Sometimes a silhouette is exactly the picture you want to take. They are striking photographs and, along with sunsets and sunrises, one of the easiest techniques to master. You may have already taken nice silhouettes but don’t understand just how you did them. With your camera fully on automatic, focus on the object you want to go black, aim at the sky and shoot. You will soon have a portfolio of impressive silhouettes and the loveliest sunsets.
Next time we’ll talk about the best time of day to take photographs outside. It may surprise you.
The Golden Rule of Thirds
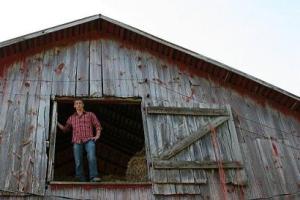
In art and photography there is a concept called the “Golden Rule of Thirds.” If you were to divide a canvas into thirds going horizontally and thirds, again, running vertically the place where the horizontal and vertical lines intersect is the desired placement for the focal point of your picture.
People invariably put a subject in the center of a photo but, if you try the “Rule of Thirds” once, you will find this simple trick can make a photograph more closely resemble art. You don’t even have to go to an art museum to see this principle used. Just begin to notice people conversing on television. A close up of a character on the right of the screen usually shows empty space to the left of them and when the other person is shown talking that person will be on the left side and an empty space will, also, open up in front of them.
Another good example of this rule is this picture of a clover blossom found on page 56 of my book:


I love it! The website looks so good, and of course this is great advice for any aspiring photographer. So great to see it up and running!
Hi Connie Garry and I so much enjoyed the brunch that you so graciously held at your lovely home. I enjoyed meeting both you and your husband. I admit to not being very excited at attending my husband’s 50 year reunion. As it turned out I enjoyed it very much and to get your beautiful book (which I read before going to sleep that night)was a special treat. Hopefully your next book will be out for my sister’s next birthday. I can’t wait to give it to her. I admire you very much for not only being a gracious hostess but being a lovely talented person.
Thank you so much for both the brunch and the lovely book. Carol Wilcox
Nice!
Hi Connie, I enjoyed your book Cultivation of a Lifestyle very much and also enjoy your websight which has really encouraged my interest in photography as I’m a beginner so the photo tips are valuable to me. Was wondering if you had a suggestion on a book that gives a novice help with understanding the basics. Debbie Dill in Washington state.
Hi Debbie, Thanks for your encouragement. There’s a great book put out by Kodak called “The Joy of Photography.” Have fun! Connie